小说网站建设采集网站搭建需要什么技术
0. 引言
之前我们讲解了本地缓存ehcache组件,在实际应用中,并不是单一的使用本地缓存或者redis,更多是组合使用来满足不同的业务场景,于是如何优雅的组合本地缓存和远程缓存就成了我们要研究的问题,而这一点,阿里开源的jetcache组件帮我们实现了
1. jetcache简介
jetcache是阿里开源的基于java开发的缓存框架,支持多种缓存类型:本地缓存、分布式缓存、多级缓存。能够满足不同业务场景的缓存需求。
jetcache具有上手简单、性能高效、拓展性强的特点。支持缓存预热 、缓存key前缀等功能。结合spring-cache使用,可以实现十分优雅的缓存类型切换
官网地址:https://github.com/alibaba/jetcache
官方文档:https://github.com/alibaba/jetcache/tree/master/docs/CN
2. jetcache使用
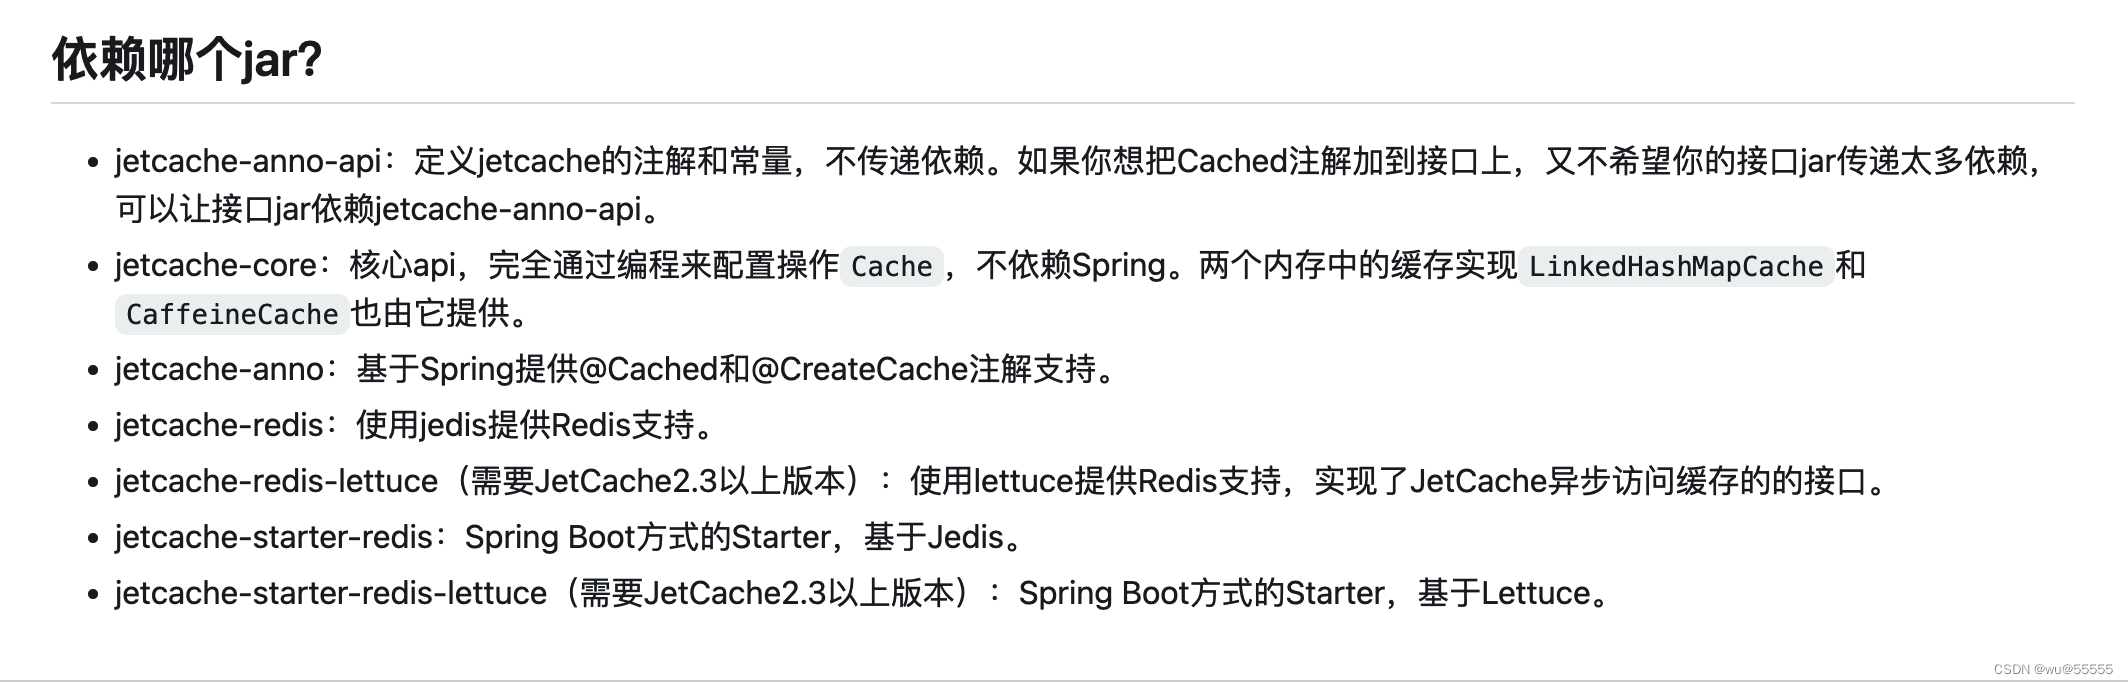
1、引入依赖,这里我们使用sringboot项目框架,同时使用redis作为远程缓存。于是我们引入jetcache-starter-redis依赖,这里我的springboot版本为2.6.13
如果是非springboot项目可以参考官网说明配置
<dependency><groupId>com.alicp.jetcache</groupId><artifactId>jetcache-starter-redis</artifactId><version>2.7.0</version>
</dependency><!--        jetcache2.7.x版本需要额外添加该依赖-->
<dependency><groupId>redis.clients</groupId><artifactId>jedis</artifactId><version>4.3.1</version>
</dependency>
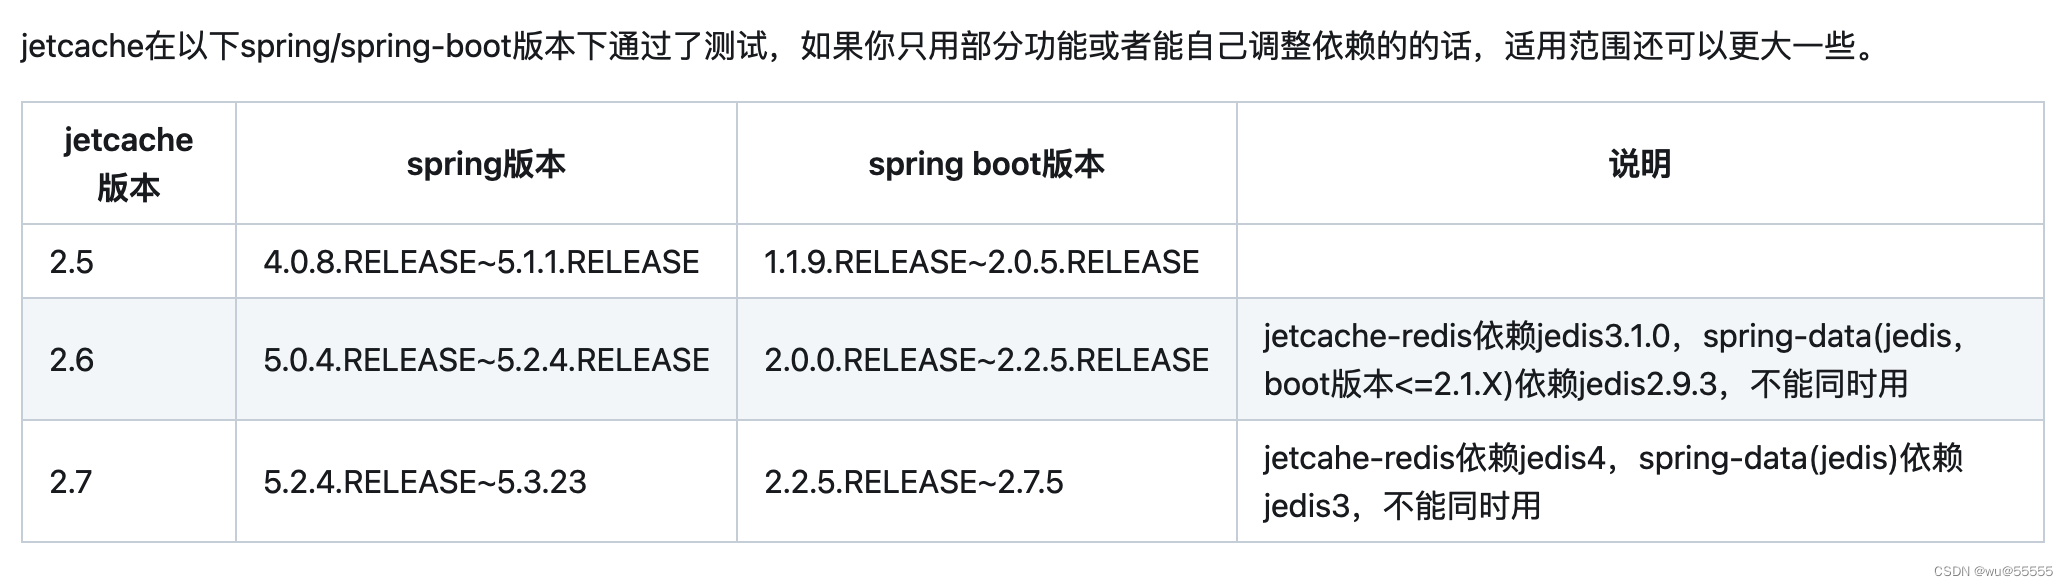
对应的版本说明如下:springboot与jetcache版本关系
2、修改配置文件,配置redis地址和线程数
jetcache:# 统计间隔,0表示不统计,开启后定期在控制台输出缓存信息statIntervalMinutes: 15# 是否把cacheName作为远程缓存key前缀areaInCacheName: false# 本地缓存配置local:default: # default表示全部生效,也可以指定某个cacheName# 本地缓存类型,其他可选:caffeine/linkedhashmaptype: linkedhashmapkeyConvertor: fastjson# 远程缓存配置remote:default: # default表示全部生效,也可以指定某个cacheNametype: redis# key转换器方式nkeyConvertor: fastjsonbroadcastChannel: projectA# redis序列化方式valueEncoder: javavalueDecoder: java# redis线程池poolConfig:minIdle: 5maxIdle: 20maxTotal: 50# redis地址与端口host: 127.0.0.1port: 6379
更详细的参数配置可参考官网说明:https://github.com/alibaba/jetcache/blob/master/docs/CN/Config.md

3、启动类添加注解@EnableCreateCacheAnnotation,开启缓存,添加@EnableMethodCache(basePackages = "com.example.jetcachedemo")注解,配置缓存方法扫描路径
4、使用缓存可以通过三种方式:
- 方式一(推荐)AOP模式:通过
@Cached,@CacheUpdate,@CacheInvalidate注解
@RestController
@RequestMapping("user")
public class UserController {@GetMapping("getRemote")@Cached(name="userCache:", key = "#id", expire = 3600, timeUnit = TimeUnit.SECONDS, cacheType = CacheType.REMOTE)public User getRemote(Long id){// 直接新建用户,模拟从数据库获取数据User user = new User();user.setId(id);user.setName("用户remote"+id);user.setAge(23);user.setSex(1);System.out.println("第一次获取数据,未走缓存:"+id);return user;}@GetMapping("getLocal")@Cached(name="userCache:", key = "#id", expire = 3600, timeUnit = TimeUnit.SECONDS, cacheType = CacheType.LOCAL)public User getLocal(Long id){// 直接新建用户,模拟从数据库获取数据User user = new User();user.setId(id);user.setName("用户local"+id);user.setAge(23);user.setSex(1);System.out.println("第一次获取数据,未走缓存:"+id);return user;}@GetMapping("getBoth")@Cached(name="userCache:", key = "#id", expire = 3600, timeUnit = TimeUnit.SECONDS, cacheType = CacheType.BOTH)public User getBoth(Long id){// 直接新建用户,模拟从数据库获取数据User user = new User();user.setId(id);user.setName("用户both"+id);user.setAge(23);user.setSex(1);System.out.println("第一次获取数据,未走缓存:"+id);return user;}@PostMapping("updateUser")@CacheUpdate(name = "userCache:", key = "#user.id", value = "#user")public Boolean updateUser(@RequestBody User user){// TODO 更新数据库return true;}@PostMapping("deleteUser")@CacheInvalidate(name = "userCache:", key = "#id")public Boolean deleteUser(Long id){// TODO 从数据库删除return true;}}这里要注意实体类User一定要实现序列化,即声明Serializable
@Data
public class User implements Serializable {private Long id;private String name;private Integer age;private Integer sex;
}
- 方式二 API模式:通过
@CreateCache,注:在jetcache 2.7 版本CreateCache注解已废弃,不推荐使用
@RestController
@RequestMapping("user2")
public class User2Controller {@CreateCache(name= "userCache:", expire = 3600, timeUnit = TimeUnit.SECONDS, cacheType = CacheType.BOTH)private Cache<Long, Object> userCache;@GetMapping("get")public User get(Long id){if(userCache.get(id) != null){return (User) userCache.get(id);}User user = new User();user.setId(id);user.setName("用户both"+id);user.setAge(23);user.setSex(1);userCache.put(id, user);System.out.println("第一次获取数据,未走缓存:"+id);return user;}@PostMapping("updateUser")public Boolean updateUser(@RequestBody User user){// TODO 更新数据库userCache.put(user.getId(), user);return true;}@PostMapping("deleteUser")public Boolean deleteUser(Long id){// TODO 从数据库删除userCache.remove(id);return true;}}
- 方式三 高级API模式:通过
CacheManager,2.7 版本才可使用
(1)添加依赖
<dependency><groupId>com.alibaba</groupId><artifactId>fastjson</artifactId><version>2.0.25</version>
</dependency>
(2)书写配置类
@Configuration
public class JetcacheConfig {@Autowiredprivate CacheManager cacheManager;private Cache<Long, Object> userCache;@PostConstructpublic void init(){QuickConfig qc = QuickConfig.newBuilder("userCache:").expire(Duration.ofSeconds(3600)).cacheType(CacheType.BOTH)// 本地缓存更新后,将在所有的节点中删除缓存,以保持强一致性.syncLocal(false).build();userCache = cacheManager.getOrCreateCache(qc);}@Beanpublic Cache<Long, Object> getUserCache(){return userCache;}
}
(3)调用代码
@RestController
@RequestMapping("user3")
public class User3Controller {@AutowiredJetcacheConfig jetcacheConfig;@Autowiredprivate Cache<Long, Object> userCache;@GetMapping("get")public User get(Long id){if(userCache.get(id) != null){return (User) userCache.get(id);}User user = new User();user.setId(id);user.setName("用户both"+id);user.setAge(23);user.setSex(1);userCache.put(id, user);System.out.println("第一次获取数据,未走缓存:"+id);return user;}@PostMapping("updateUser")public Boolean updateUser(@RequestBody User user){// TODO 更新数据库userCache.put(user.getId(), user);return true;}@PostMapping("deleteUser")public Boolean deleteUser(Long id){// TODO 从数据库删除userCache.remove(id);return true;}}
多级缓存的形式,会先从本地缓存获取数据,本地获取不到会从远程缓存获取
5、启动redis,启动演示项目
注意,如果启动出现
NoClassDefFoundError: redis/clients/util/Pool或NoClassDefFoundError: redis/clients/jedis/UnifiedJedis报错,说明springboot与jetcache版本不一致,对应关系可参考上述第一步中的说明
同时如果使用的是jetcache2.7.x版本,因为该版本中有jedis包的依赖,需要额外添加如下依赖,或者将jetcache版本将至2.6.5以下
<dependency><groupId>redis.clients</groupId><artifactId>jedis</artifactId><version>4.3.1</version>
</dependency>
3. 测试
3.1 方式一测试
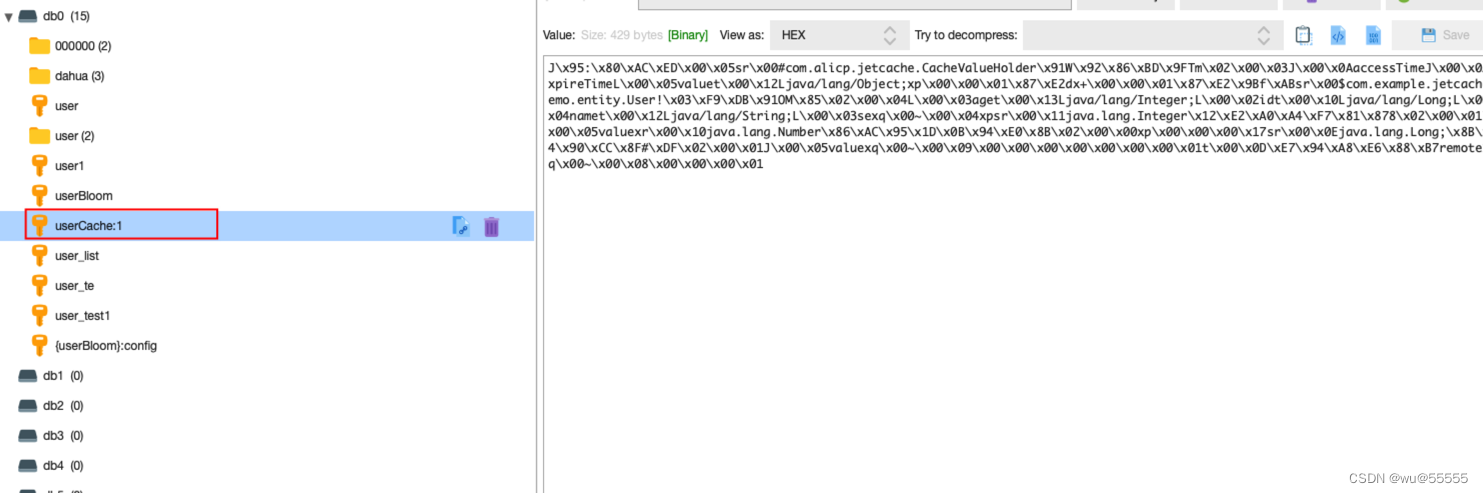
1、访问localhost:8088/user/getRemote?id=1
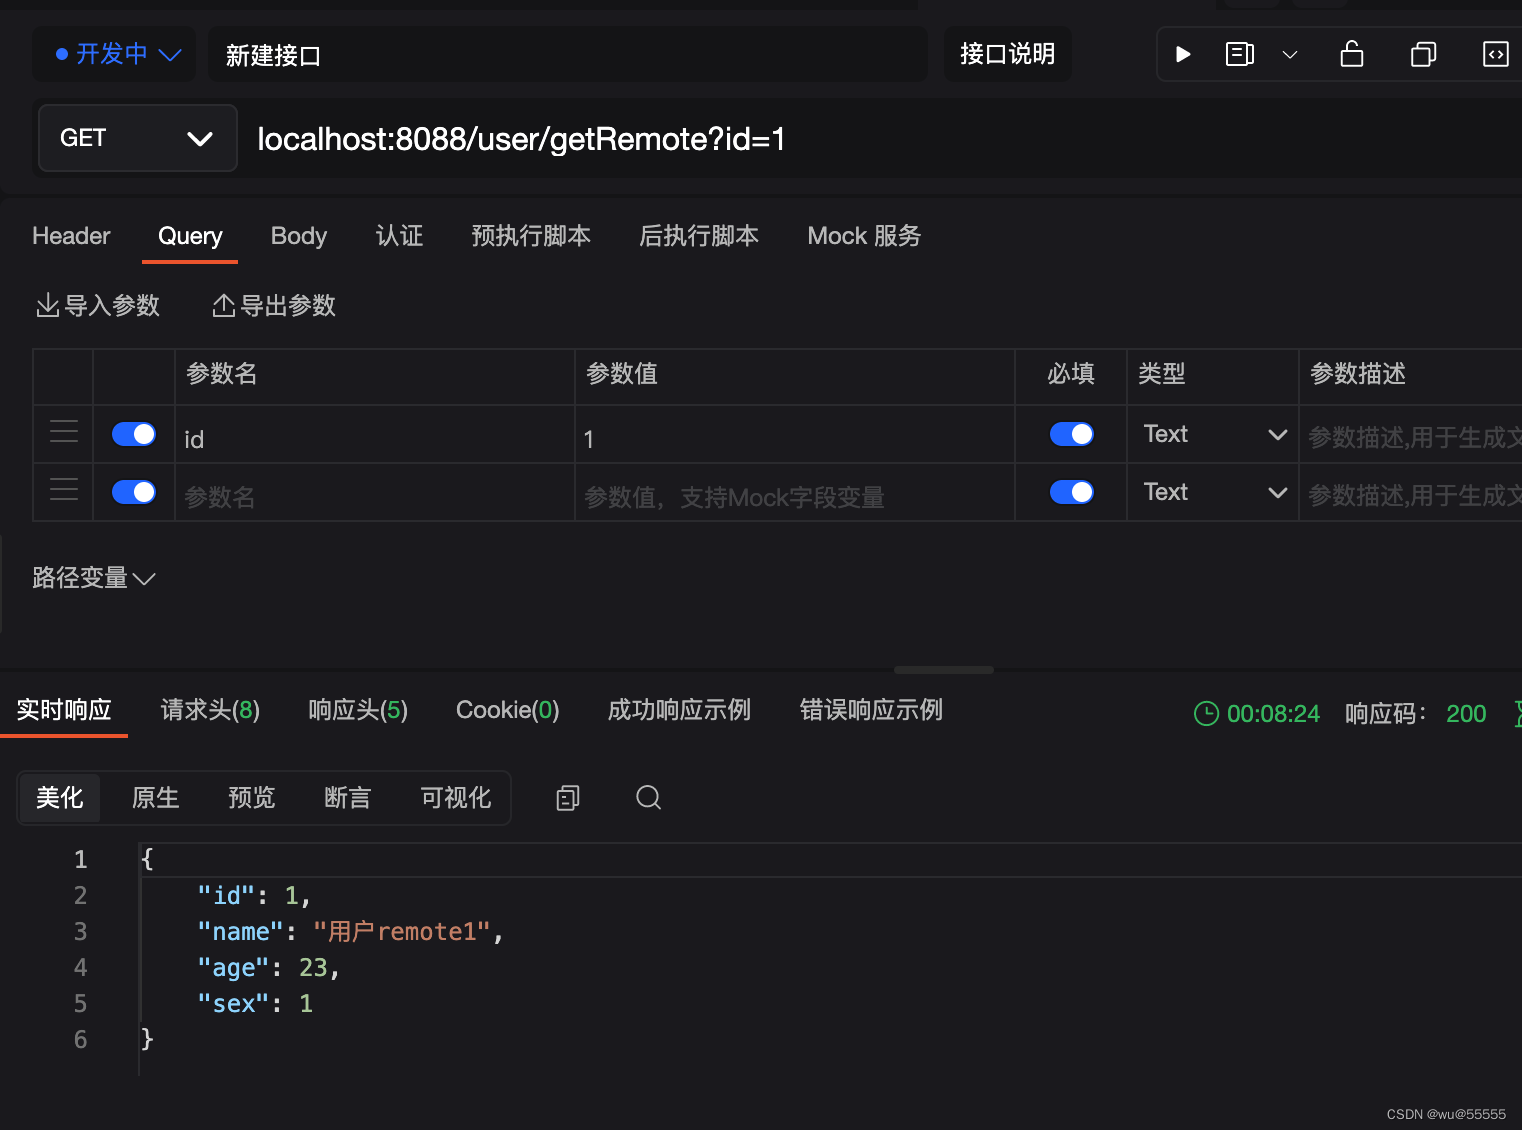
因为配置的是远程缓存,在redis中也能看到对应的key
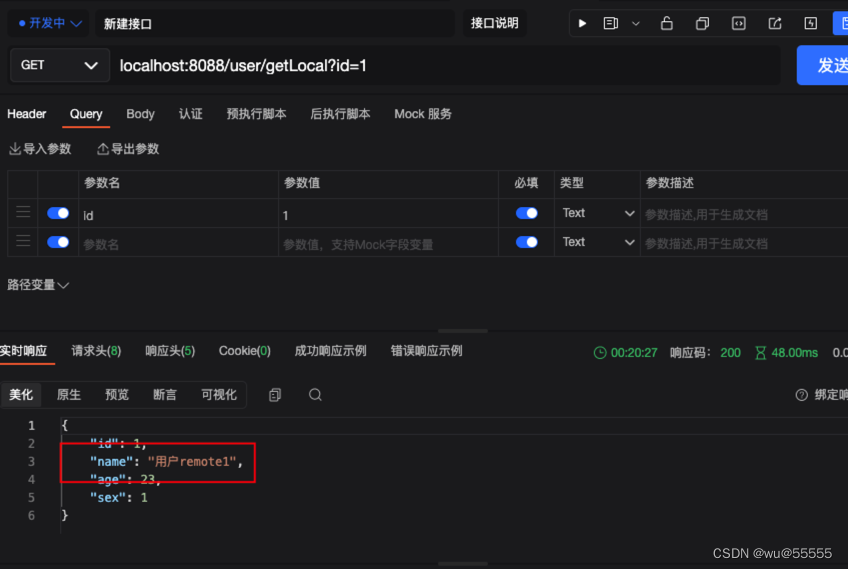
2、访问localhost:8088/user/getLocal?id=1,这个方法是从本地缓存获取的,现在只有远程缓存上有数据,我们调用发现缓存数据还是拿到了,这说明当我们在配置文件中配置了本地缓存和远程缓存后,方式一中本地缓存和远程缓存会自动相互调用
比如本地缓存有这个key,redis中没有,通过远程缓存方式访问时,会先从redis获取,如果没有会自动获取本地缓存,但是数据还是存储在本地缓存,并不会同步到redis上,这样更加灵活的实现了多级缓存架构
3.2 方式二测试
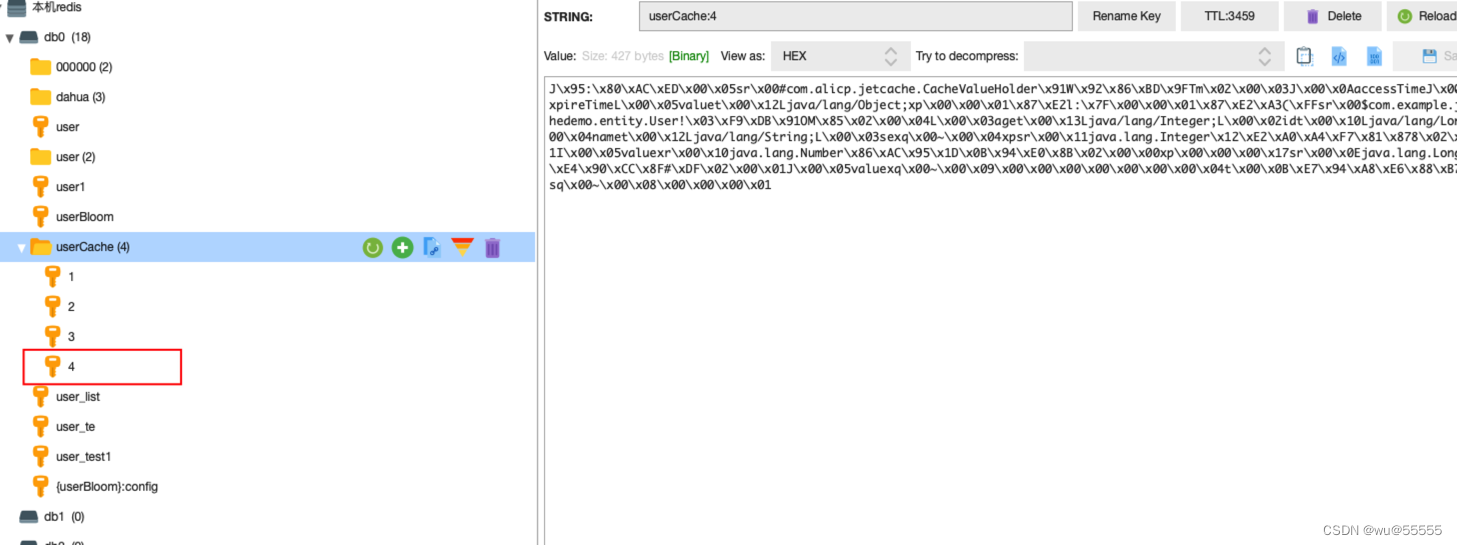
1、再测试下CreateCache的形式:localhost:8088/user2/get?id=4
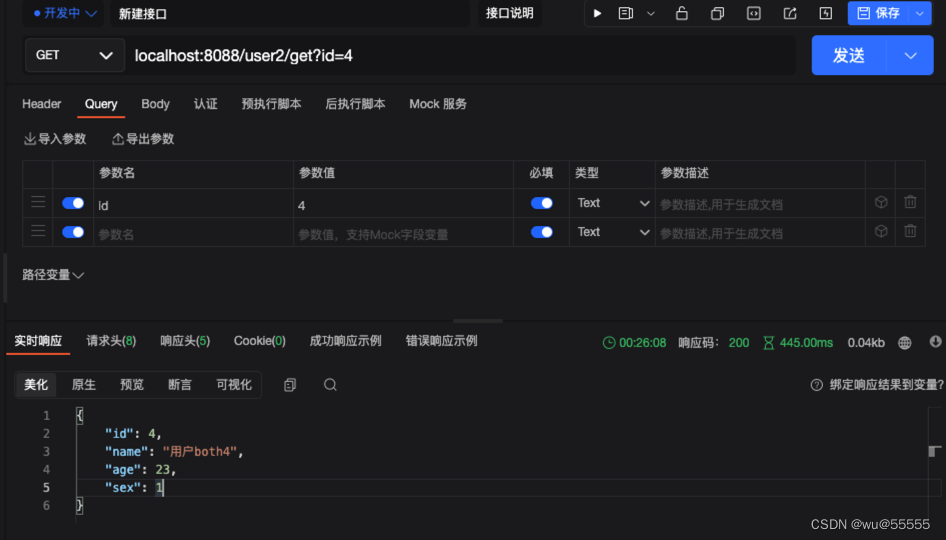
正常获取了,并且redis中也有了对应的值
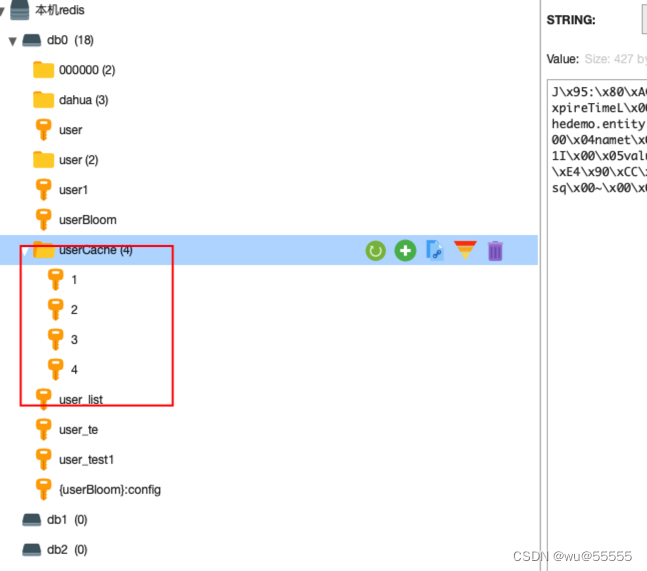
而当我们把缓存方式更改为LOCAL后,再访问localhost:8088/user2/get?id=5
@CreateCache(name= "userCache:", expire = 3600, timeUnit = TimeUnit.SECONDS, cacheType = CacheType.LOCAL)
会发现redis中就没有对应缓存了,只在本地缓存存在,说明我们指定本地缓存的形式成功了
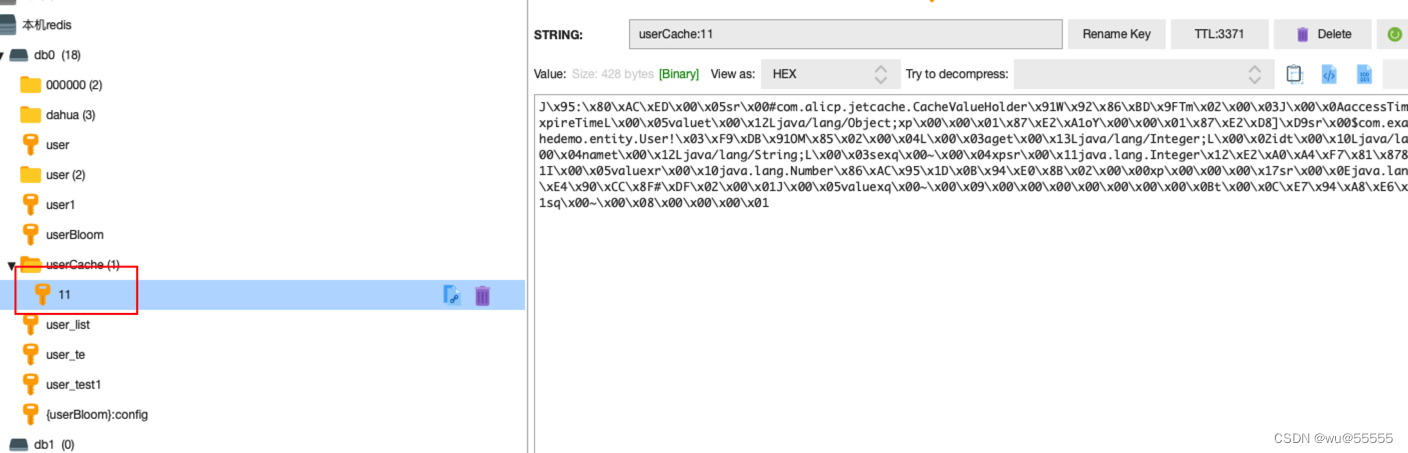
3.3 方式三测试
1、调用localhost:8088/user3/get?id=11
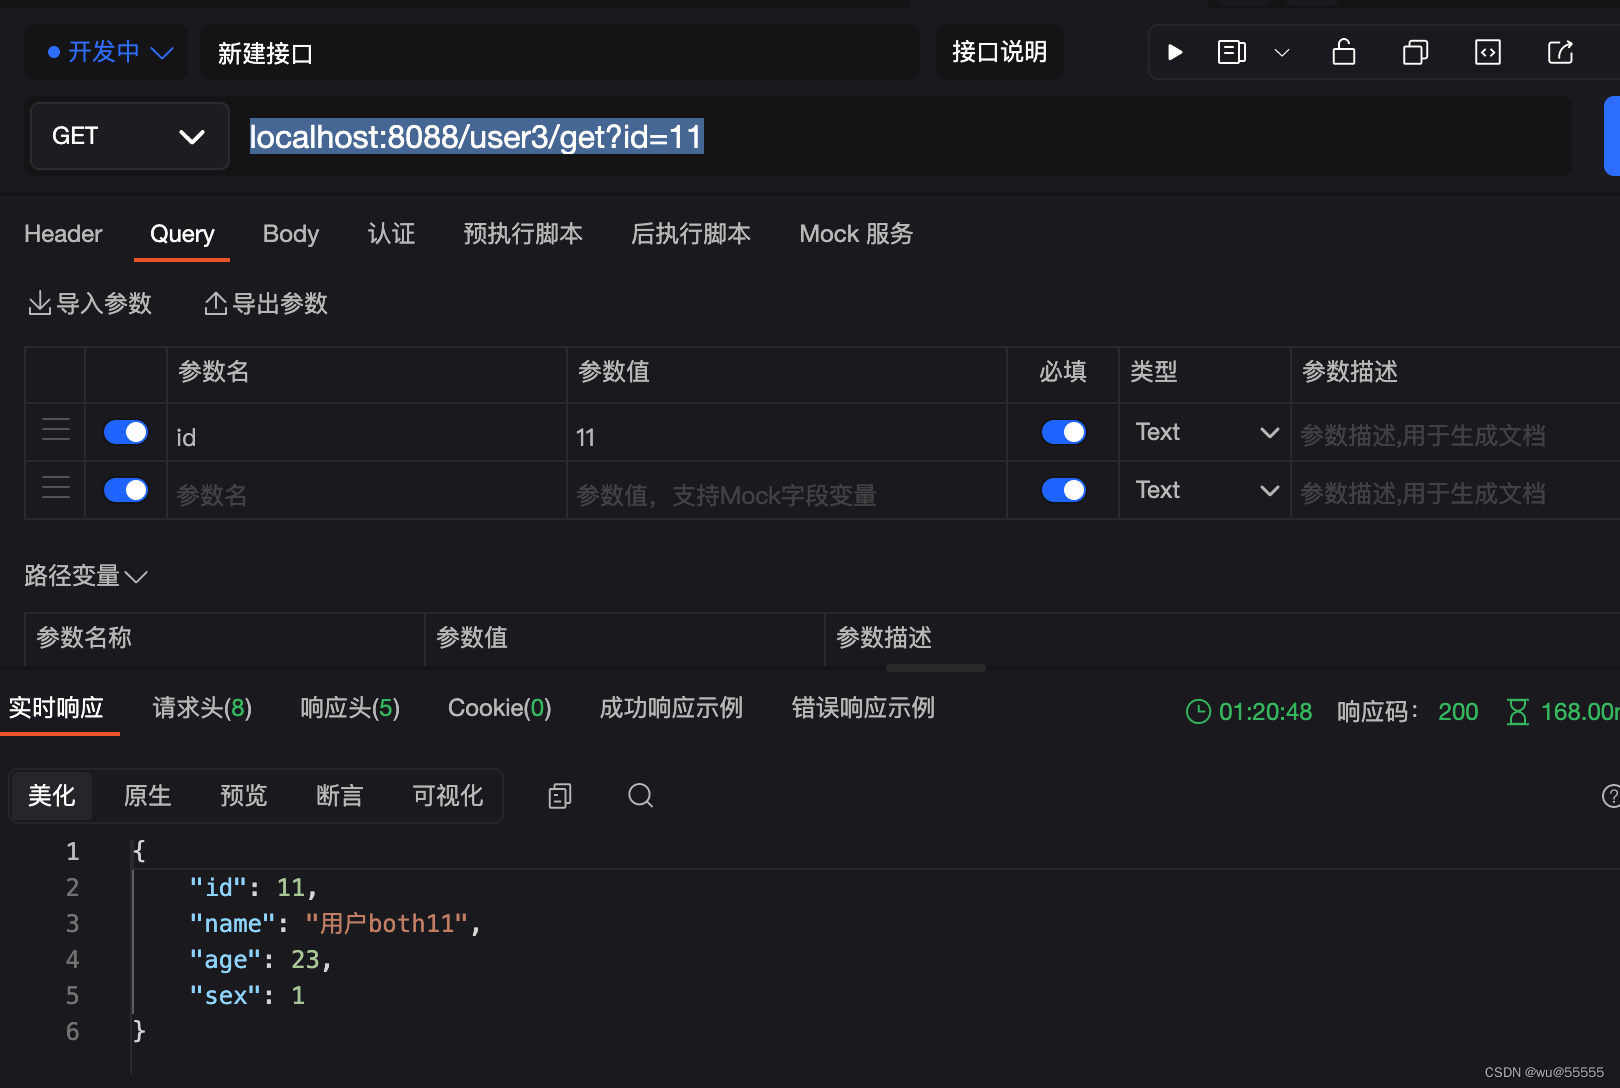
redis中缓存设置成功!
4. 常见报错
1、 ClassNotFoundException: com.alibaba.fastjson.JSON
解决:添加依赖
<dependency><groupId>com.alibaba</groupId><artifactId>fastjson</artifactId><version>2.0.25</version>
</dependency>
2、NoClassDefFoundError: redis/clients/jedis/UnifiedJedis
解决:
添加依赖
<dependency><groupId>redis.clients</groupId><artifactId>jedis</artifactId><version>4.3.1</version>
</dependency>
或者将jetcache版本降低至2.6.5以下
演示源码
https://gitee.com/wuhanxue/wu_study/tree/master/demo/jetcache-demo