手机网站如何推广疫情最新资讯
cnocr配置及训练测试
- 1,相关链接
- 2,已有模型调用测试
- (1)下载相关模型
- (2)Cnstd文本检测模型
- (3)模型调用解析脚本
- 3,自定义数据集训练测试
- (1)标签转换
- (1-1)标签转换脚本labelme2cnocr.py
- (1-2)转换为cnocr数据集
- (2)训练
- (2-1)训练命令
- (2-2)训练结果
- (2-3)训练日志可视化(可略过)
- (3)测试
- (3-1)测试脚本
- (3-2)测试结果
1,相关链接
https://gitee.com/cyahua/cnocr/
cyahua / cnocr
https://github.com/breezedeus/CnOCR#%E5%8F%AF%E4%BD%BF%E7%94%A8%E7%9A%84%E8%AF%86%E5%88%AB%E6%A8%A1%E5%9E%8B
使用英文和数字的模型
https://zhuanlan.zhihu.com/p/660022852
CnOCR 纯数字识别新模型(里面包含博主自定义训练的硬币数据集)
纯英文模型检测精度更高,适用于检测字符相关
2,已有模型调用测试
(1)下载相关模型
https://zhuanlan.zhihu.com/p/660022852

https://pan.baidu.com/s/1wvIjbjw95akE-h_o1HQd9w?pwd=nocr&at=1703123910772#list/path=%2F

(2)Cnstd文本检测模型
https://github.com/breezedeus/cnstd
由此可知cnocr其内部文本检测使用的就是cnstd工具包,而进行cnocr训练的只有识别模型


(3)模型调用解析脚本
手写解析功能用于测试
from cnocr import CnOcr
import cv2#https://gitee.com/cyahua/cnocr?_from=gitee_search
#专用英文的模型#img_fp = './docs/examples/huochepiao.jpeg'
img_fp = 'E:/tupian/ocr2/O16.bmp'ocr = CnOcr(det_model_name='en_PP-OCRv3_det', rec_model_name='en_PP-OCRv3')  # 所
out = ocr.ocr(img_fp)print(out)# 结果处理
#绘制矩形框到图像
# img2 = img_fp.copy()
img_fp2 = cv2.imread(img_fp)
results = ''
for output in out:result_text = output['text']result_position = output['position']# #数组转换成列表list_position = result_position.tolist()print(list_position)print(type(list_position))p0 = (int(list_position[0][0]),int(list_position[0][1]))p1 = (int(list_position[1][0]),int(list_position[1][1]))p2 = (int(list_position[2][0]),int(list_position[2][1]))p3 = (int(list_position[3][0]),int(list_position[3][1]))print(p0)print(p1)print(p2)print(p3)color_l = (0, 200, 0)thickness_l = 2cv2.line(img_fp2, p0, p1, color_l, thickness_l)cv2.line(img_fp2, p1, p2, color_l, thickness_l)cv2.line(img_fp2, p2, p3, color_l, thickness_l)cv2.line(img_fp2, p3, p0, color_l, thickness_l)font = cv2.FONT_HERSHEY_SIMPLEXfontScale = 1color = (255, 0, 0)thickness = 2cv2.putText(img_fp2, result_text, p0, font, fontScale, color, thickness, cv2.LINE_AA)cv2.imshow('demo',img_fp2)
cv2.waitKey(0)
相关测试结果

3,自定义数据集训练测试
(1)标签转换
(1-1)标签转换脚本labelme2cnocr.py
import cv2
import os
import csvinput_path = "E:/tupian/ocr2/ocr_data"
output_path = "./data"
ratio = 0.1#拆分列表
def split_list(lst, ratios, num_splits):"""将列表按照指定比例和数量拆分成子列表:param lst: 待拆分列表:param ratios: 每个子列表的元素占比,由小数表示的列表:param num_splits: 子列表的数量:return: 拆分后的子列表组成的列表"""if len(ratios) != num_splits:raise ValueError("The length of ratios must equal to num_splits.")total_ratio = sum(ratios)if total_ratio != 1:raise ValueError("The sum of ratios must be equal to 1.")n = len(lst)result = []start = 0for i in range(num_splits):end = start + int(n * ratios[i])result.append(lst[start:end])start = endreturn resultdef read_path(input_path,output_path,ratio):#遍历该目录下的所有图片文件train_list = []for filename in os.listdir(input_path):if '.jpg' in filename:img_filename = filenameimg_path = input_path +'/' + filenametxt_path = input_path +'/' + filename.replace('.jpg','.txt')img_output_path = output_path + "/images/" + img_filenameif not os.path.exists(output_path + "/images"):os.makedirs(output_path + "/images")print(img_path)print(txt_path)#读取保存图像img = cv2.imread(img_path)cv2.imwrite(img_output_path, img)#读取txt文件并保存到tsv#中间用tab隔开(字符空格隔开,使用space表示空格)label = ''with open(txt_path, "r", encoding='utf-8') as f:# read():读取文件全部内容,以字符串形式返回结果data = f.read()for char in data:if char == ' ':char = '<space>'label = label + char + ' 'label = label.replace(' \n ','')print(label)name_label_list =[]name_label_list.append(img_filename)name_label_list.append(label)print(name_label_list)train_list.append(name_label_list)#按照比例分割开ratios = [1-ratio, ratio]num_splits = 2result = split_list(train_list, ratios, num_splits)#其中,train.tsv是待创建的文件名或项目文件夹中已有的文件名,‘w’代表写入,指定newline=’‘是为了避免每写出一行数据就会有一个空行,delimiter代表分隔符,tsv的分隔符为’\t’,csv的分隔符为’,’。with open(output_path + '/train.tsv', 'w', newline='') as tsvfile:writer = csv.writer(tsvfile, delimiter='\t')writer.writerows(result[0])with open(output_path + '/dev.tsv', 'w', newline='') as tsvfile:writer = csv.writer(tsvfile, delimiter='\t')writer.writerows(result[1])#注意*处如果包含家目录(home)不能写成~符号代替
#必须要写成"/home"的格式,否则会报错说找不到对应的目录
#读取的目录
read_path(input_path, output_path, ratio)
#print(os.getcwd())
(1-2)转换为cnocr数据集

会生成三个文件,images是图像,dev.tsv是测试集,train.tsv是训练集


(2)训练
(2-1)训练命令

使用cpu进行的训练
(venv) PS G:\pyproject\CnOCR-master> cnocr train -m densenet_lite_136-fc -p data/densenet_lite_136-fc/cnocr-v2.2-densenet_lite_136-fc-epoch=039-complete_match_epoch=0.8597-model.ckpt --index-dir data --train-config-fp data/train_con
fig.json

(2-2)训练结果


(2-3)训练日志可视化(可略过)
https://blog.csdn.net/qq_44864833/article/details/131295460
wandb快速上手、使用心得(超好用的Tensorboard高替品)

离线训练完成后,可以通过wandb sync将相关日志文件上传,然后在线查看


https://wandb.ai/authorize
登录上方创建账号和key


(3)测试
(3-1)测试脚本
from cnocr import CnOcr
import cv2
import os#https://gitee.com/cyahua/cnocr?_from=gitee_search
#专用英文的模型def detect_imgs(input_path,output_path):for filename in os.listdir(input_path):if ('.jpg' in filename) or ('.png' in filename) or ('.bmp' in filename):img_filename = filenameimg_fp = input_path + '/' + filenametxt_path = input_path + '/' + filename.replace('.jpg', '.txt')img_output_path = output_path + "/outimgs/" + img_filenameif not os.path.exists(output_path + "/outimgs"):os.makedirs(output_path + "/outimgs")#img_fp = './docs/examples/huochepiao.jpeg'# img_fp = 'E:/tupian/ocr2/O7.bmp'# #使用已有的模型# ocr = CnOcr(det_model_name='en_PP-OCRv3_det', rec_model_name='en_PP-OCRv3')  # 所en_PP-OCRv3 , en_number_mobile_v2.0, number-densenet_lite_136-fc# out = ocr.ocr(img_fp)# print(out)training_model_fp = "G:/pyproject/CnOCR-master/runs/CnOCR-Rec/5b5uka01/checkpoints/last.ckpt"# #调用自训练的识别模型,对原数据集进行验证(验证使用单行不要使用检测模型)ocr = CnOcr(rec_model_fp=training_model_fp, rec_model_backend='pytorch')  # 调用训练好的识别模型(使用单行的进行)#ocr = CnOcr(rec_model_name='en_PP-OCRv3')out = ocr.ocr_for_single_line(img_fp)# print(out)# results = '--' + out['text']# img_fp2 = cv2.imread(img_fp)# cv2.imwrite(img_output_path, img_fp2)#调用配置好的模型(使用已有的检测模型en_PP-OCRv3_det,效果并不是很好,在原数据集上)#####################################################################ocr = CnOcr(det_model_name = 'en_PP-OCRv3_det', rec_model_name = 'densenet_lite_136-fc', rec_model_fp = training_model_fp, rec_model_backend = 'pytorch')  # 所en_PP-OCRv3 , en_number_mobile_v2.0ocr = CnOcr(det_model_name='en_PP-OCRv3_det', rec_model_fp=training_model_fp, rec_model_backend = 'pytorch') #调用训练好的模型out = ocr.ocr(img_fp)#结果处理#绘制矩形框到图像img_fp2 = cv2.imread(img_fp)results = ''for output in out:result_text = output['text']result_position = output['position']# #数组转换成列表list_position = result_position.tolist()print(list_position)print(type(list_position))p0 = (int(list_position[0][0]),int(list_position[0][1]))p1 = (int(list_position[1][0]),int(list_position[1][1]))p2 = (int(list_position[2][0]),int(list_position[2][1]))p3 = (int(list_position[3][0]),int(list_position[3][1]))print(p0)print(p1)print(p2)print(p3)color_l = (0, 200, 0)thickness_l = 2cv2.line(img_fp2, p0, p1, color_l, thickness_l)cv2.line(img_fp2, p1, p2, color_l, thickness_l)cv2.line(img_fp2, p2, p3, color_l, thickness_l)cv2.line(img_fp2, p3, p0, color_l, thickness_l)font = cv2.FONT_HERSHEY_SIMPLEXfontScale = 1color = (255, 0, 0)thickness = 2cv2.putText(img_fp2, result_text, p0, font, fontScale, color, thickness, cv2.LINE_AA)results = results + '--' + result_text#cv2.imshow('demo',img_fp2)cv2.imwrite(img_output_path,img_fp2)#cv2.waitKey(0)############################################################################################################string_txt = img_output_path.replace('.jpg','') + '_'+ results + '.txt'print(string_txt)with open(string_txt, 'w') as tsvfile:tsvfile.write(results)#input_path = 'G:/pyproject/CnOCR-master/data/images'
input_path = 'E:/tupian/ocr2'
output_path = 'G:/pyproject/CnOCR-master/data'detect_imgs(input_path,output_path)
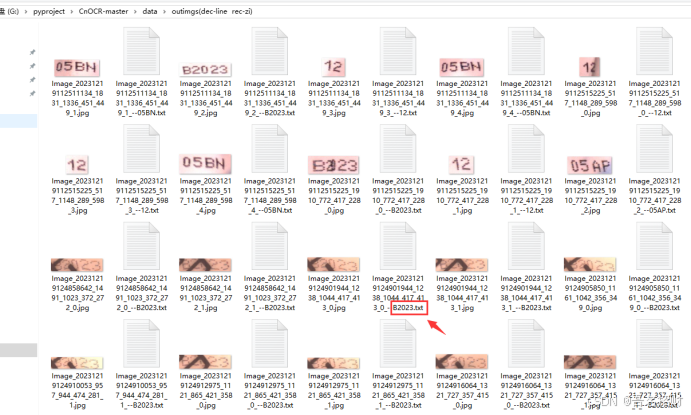
(3-2)测试结果
使用预训练模型训练300轮次左右得到的测试效果如下,被遮挡的文字识别也是比较准确的。